
0051 00
TM 1-4920-433-13&P
REMOVAL
DOOR LOCK TABS
CAUTION
Use extreme care not to grind or cut through the shelter skin.
1.
Grind welds (Figure 1, Item 2) from damaged door lock tabs (Figure 2, Item 1).
2.
Drill out two rivets (Figure 1, Item 3) attaching door lock tabs (Figure 2, Item 1).
3.
Remove door lock tabs (Figure 2, Item 1).
4.
Burnish skin surface of paint and epoxy down to bare metal.
INSTALLATION
DOOR LOCK TABS
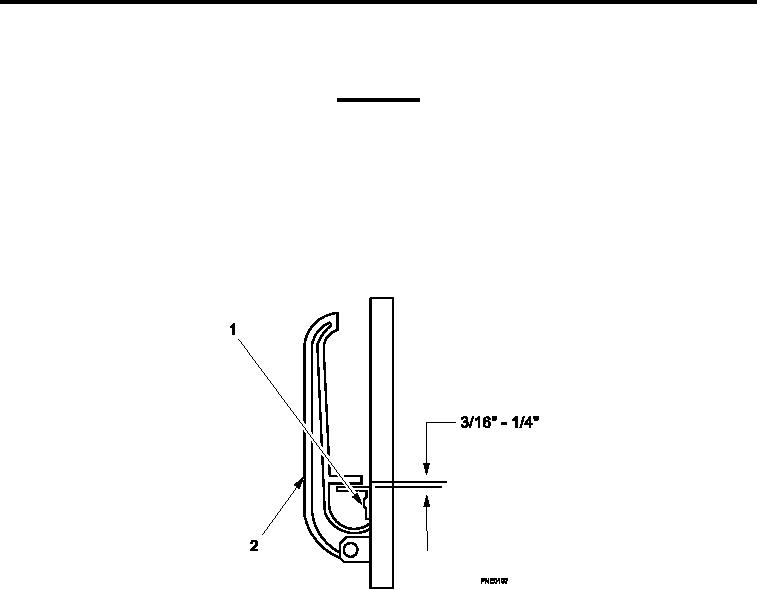
Figure 2.
Door Lock Tabs Placement.
1.
Install door lock tabs (Figure 2, Item 1) by using latch handle (Figure 2, Item 2) as a guide to position.
2.
Mark position of door lock tabs (Figure 2, Item 1).
NOTE
There should be adequate clearance for latch handle to swing around door lock tabs without
3.
Rotate latch handle (Figure 2, Item 2) out of way and match drill door lock tabs (Figure 2, Item 1) to door in
two places.
4.
Deburr all holes and clean off all metal shavings.
NOTE
Dip rivet s mandrel in polysulide sealant before inserting into drilled holes.
5.
Position door lock tabs (Figure 2, Item 1) and insert two rivets into two pre-drilled holes.
0051 00-2