
TM 1-4920-435-13&P
0064 00
INSPECTION OF INSTALLED ITEMS
OIL AND WATER SEPARATOR
NOTE
Remove center gauge if necessary to tighten bolts.
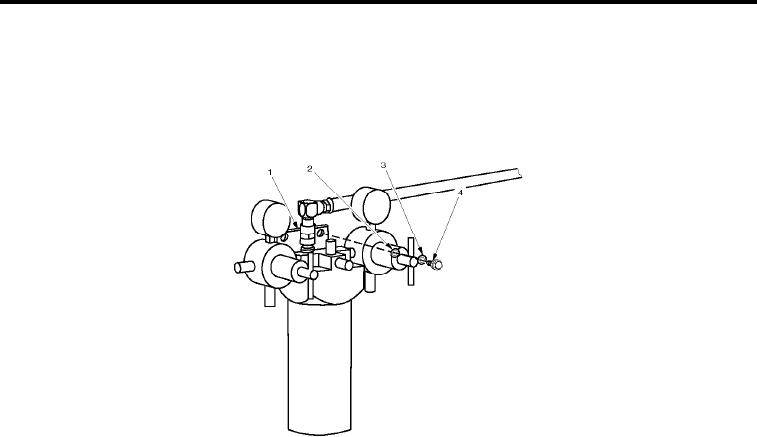
Figure 8.
Inspect Oil/Water Separator.
1.
Inspect oil/water separator hardware (Figure 8, Item 2 through Figure 8, Item 4) for rust, cracks and rounded
heads.
2.
Replace oil/water separator hardware (Figure 8, Item 2 through Figure 8, Item 4) as necessary.
If necessary, torque bolts (Figure 8, Item 4) 100-140 in. lbs.
3.
4.
Inspect oil/water separator (Figure 8, Item 1) for damage that would deem oil/water separator (Figure 8, Item
1) non-operational.
5.
Replace oil/water separator (Figure 8, Item 1) if deemed non-operational.
REMOVAL
OIL AND WATER SEPARATOR
1.
Remove non-metallic hose Non-Metallic Hose and Fittings Remove .
2.
Remove two bolts (Figure 8, Item 4), two lock washers (Figure 8, Item 3), two lat washers (Figure 8, Item 2),
and oil/water separator (Figure 8, Item 1).
INSTALLATION
OIL AND WATER SEPARATOR
1.
Position oil/water separator (Figure 8, Item 1) over wall inserts.
2.
Install two bolts (Figure 8, Item 4), two lock washers (Figure 8, Item 3), and two lat washers (Figure 8, Item
2).
Torque bolts (Figure 8, Item 4) 100- 140 in. lbs.
3.
END OF WORK PACKAGE
0064 00-5/6 blank