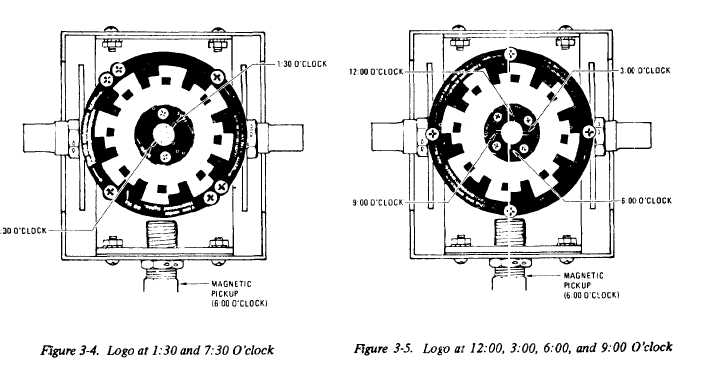
Figure 3-4.
Figure 3-5.
TM 55-4920-402-13&P
(2)
(3)
(4)
(5)
(6)
(7)
(8)
(9)
(10)
(11)
Set up Tester rotor for double interrupter
(all six interrupter screws installed).
Set Strobex MODE switch to A.
Illuminate Tester rotor with Strobex. Verify
that the stem of the h in the logo appears
stopped at 12:00, 3:00, 6:00, and 9:00
o’clock (fig. 3-5).
Set Tester CAM RATE (RPM) and
Balancer RPM TUNE to 1800. RPM
RANGE to X10. Observe the same
results.
Set INTERRUPTER LOGIC switch to
SINGLE.
Shut off Tester.
Remove the two opposite pairs of interrupter
screws on the Tester (four total) leaving only
the two opposite single screws (fig. 3-3).
Run the Tester at 1800 RPM and illuminate
the rotor with the Strobex. Verify that the
stem of the h appears stopped at 12:00
and 6:00 o’clock.
Set Tester CAM RATE (RPM) and
Balancer RPM TUNE to 900. RPM
RANGE to Xl. Observe the same
results.
Shut off Tester.
c. Performance Check of the Strobex Locking
Oscillator Mode.
(1) Remove interrupter screws from the Tester
disc leaving only the one to which the stem
of the h points (fig. 3-6).
3-6
Change 4
(2)
(3)
(4)
(5)
(6)
(7)
(8)
(9)
(10)
(11)
Set Strobex MODE switch[ to position E and
RPM dial to 090.
Run Tester at 1800 RPM and illuminate Tester
rotor with the Strobex.
Adjust Strobex RPM dial until the stem of
the h appears stopped at 6:00 o’clock.
Set Strobex RPM dial to 180 ( actual
rotor rate) and adjust Strobex RPM dial until
the stem of the h appears stopped at 12:00
and 6:00 o’clock.
Reduce the Strobex, RPM dial setting while
observing the h image. Verify that the stem
of the h remains at 6:00 o’clock but the
12:00 o’clock stem moves clockwise until
about 2:00 or 2:30 o’clock. Further deduc-
tion of the Strobex RPM dial setting causes,
the image to become very erratic.
Set Strobex MODE switch to B and RPM dial
to 180 (450 rotor RPM times one blade times
0.4, as stated on Strobex rear panel).
Operate Tester at 900 RPM and illuminate
Tester disc with the Strobex. Adjust Strobex
RPM dial until sterr of h appears stopped
at 6:00 o’clock.
Increase the Strobex RPM dial setting to slight-
ly above 180 and verify that the image starts
revolving counterclockwise.
Set Strobex RPM dial to 360 and adjust until
the stem of the h appears stopped at 12:00
and 6:00 o’clock.
Reduce the Strobex RPM dial setting while
observing the h image. Verify that the stem
of the h remains at 6:00 o’clock and the
12:00 o’clock stem moves clockwise.