TM 9-4940-421-14
(7) Install the gaskets and valve covers. Tighten
position is 270 degrees past the position of (4) above.
the capscrews securely.
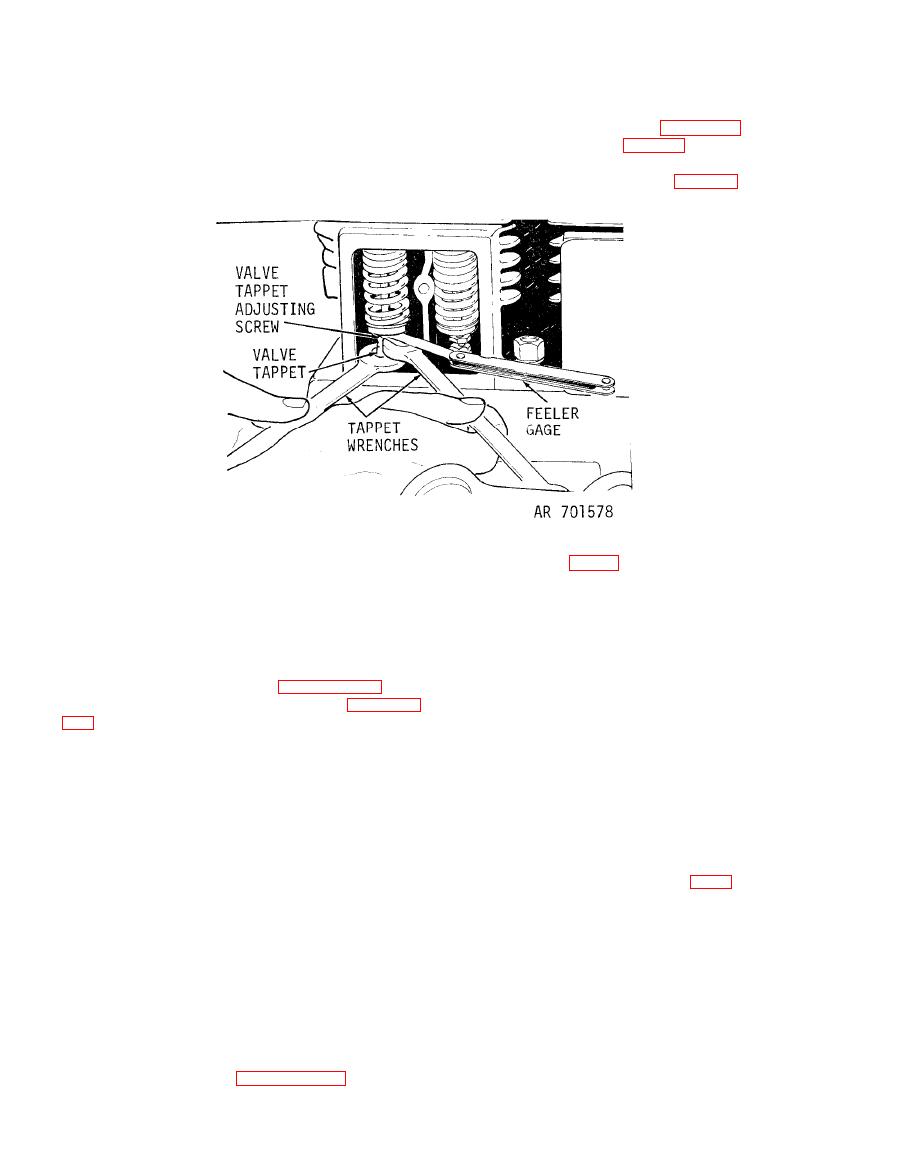
Adjust the tappet clearance of no. 4 cylinder.
(6) Turn the crankshaft clockwise until the chalk-
(8) Install cylinder heads (para 6-llc).
(9) Install governor (para 4-23).
marked vane is alined with the no. 2 cylinder cen-
(10) Install the flywheel screen.
terline. This position is 180 degrees past the position
(11) install the spark plugs (para 4-16c).
(5) above. Adjust the tappet clearance of no. 2 cylinder.
a. General. The bottom cover plate is also the oil pan
a. General. The valve seats are replaceable, har-
of the engine which serves as an oil reservoir. The oil
dened inserts which are pressed into the cylinder
pan is provided with a pipe plug to drain the oil.
blocks. The inserts should be replaced if they are pitted
b. Removal.
o r burnt to the point where ordinary grinding
(1) Drain all the crankcase oil from the engine.
procedureswill not make them serviceable.
(2) Lay the engine on its side supporting it in such
b. Valve-Sea t Insert Replacement.
a manner which will prevent damage to the cylinder
(1) Remove as instructed in paragraph 6-12b.
air shrouds.
(2) Clean andinspect asinstructed in paragraph
(3) Remove the four capscrews and lockwashers
that secure the front and rear engine supports to the
(3) Using a suitable puller, remove the exhaust
bottom of the crankcase. Remove the engine supports.
valve-seat inserts. Take care not to damage the insert
(4) Remove the fourteen capscrews and lock-
counterbore.
washers that secure the crankcase bottom cover plate
(4) (lean all the carbon from the insert counter-
to the crankcase. Remove the cover plate and gasket.
bore, and from the valve port.
c. Cleaning and Inspection.
CAUTION
(1) Scrape out all sludge and foreign particles ac-
Do not attempt to drive in an oversized
cumulated on the bottom of the oil pan, and wash all
i n s e r t before machining the counter-
parts removed in cleaning solvent (app D).
bore.
(2) Brush the screen with a stiff brush and remove
(5) Finish the counterbores in the cylinder blocks
all sludge and foreign matter from between the wires
so that bore-to-insert interference is between 0.002
of the screen. Dry with clean, dry compressed air.
and 0.004 inch. Chill the inserts with dry ice; then,
(3) Inspect the oil pan for dents. If minor, smooth
using a pilot driver, tap the insert in place with light
out with hammer and wood block. Replace the oil pan if
blows. Peen the insert to anchor it in place.
it is damaged beyond serviceable limits.
(6) Reface each insert if necessary to make their
valve seats concentric with the valve stem bore. Use a
d. Installation. Install new oil pan gasket and the oil
pan with the deep end of oil pan toward oil pump.
dial indicator and make sure that the valve seats are
Secure with fourteen capscrews and washers. Tighten
concentric. Regrind the valve seats if necessary.
capscrews 6 to 9 lbs. ft.
(7) Install the valves, and adjust the tappet
clearance as instructed in paragraph 6-12.


