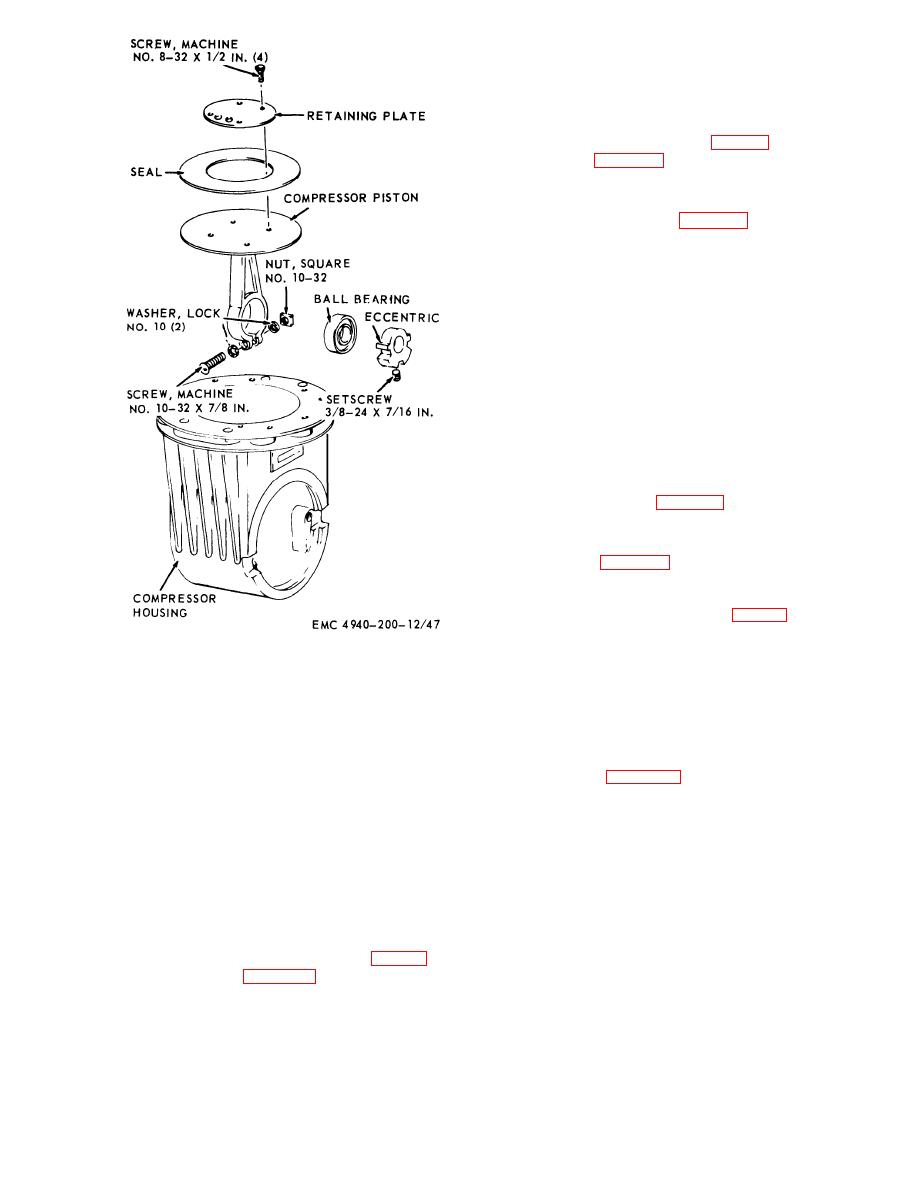
85. Compressor Housing and Compressor
Motor
a. Removal.
(1) Remove base plates and rubber mounts
(par. 83).
(2) Remove compressor head (par. 84).
(3) Refer to figure 58 and remove the bearing
cover, bearing, and compressor housing
from the compressor mot or.
semble the compressor housing.
c. Cleaning, Inspection, and Repair.
(1) Clean all metal parts with an approved
cleaning solvent and dry thoroughly.
(2) Inspect the housing for cracks, breaks, or
other damage. Replace a damaged housing,
(3) Inspect the bearings, piston, and eccentric
f o r scoring, nicks j and wear. Replace
damaged bearings, piston, or eccentric.
(4) Inspect all hardware for worn or damaged
threads. Replace as necessary.
(5) Connect motor to outside power source and
inspect for proper operation. Replace a
defective motor.
d. Reassembly. Refer to figure 59 and reassemble
the compressor housing in reverse order.
c. Installation.
(1) Refer to figure 58 and install the bearing,
bearing cover , and compressor housing to
the compressor motor.
(3) Install the rubber mounts and base plates
(par. 83).
homing, disassembly and reassembly.
Compressor
Section X11. SHOP SET BODY
extinguisher b r a c k e t f r o m t h e M o d e l
86. General
SECM shop set body.
The shop set body is a riveted structure contain-
(3) Refer to figure 60 and remove the fire
ing eight watertight compartments and is mounted
extinguisher bracket in a like manner from
on a modified 4 by 4 truck chassis. The shop set
the floorboard of the cab on Model CMU-5
body includes tool clips, safety and mounting straps,
shop set.
doors, lock and latch assemblies, brackets and
b. Cleaning and Inspection.
braces, tailgate and fasteners, oxygen cylinder rack,
(1) Clean all parts with an approved cleaning
and electrical receptacles.
solvent and dry thoroughly.
(2) Inspect the fire extinguisher bracket for
87. Fire Extinguisher Bracket
dents, cracks, or breaks. Straighten all
a. Removal.
dents and replace a defective bracket.
(3) Inspect the hardware for worn or damaged
(1) Remove the fire extinguisher (par. 27).
threads. Replace as necessary.
(2) Refer to figure 60 and remove the fire
TACO 5672-A


